
Testing and Calibrating the UV Lamps
The level of UV radiation from the lamps used for curing models can change over time. To ensure optimum curing of models during printing, a pop-up message reminds you to test the lamps and calibrate their level of UV radiation after every 300 hours of printing. You do this by running the UV Calibration Wizard, using a UV radiation meter approved for use with the printer.
The wizard compares the measured radiation to the recommended radiation level for each of the lamps, at each printing mode—High Speed, High Quality and Digital Material.
When calibrating the lamps, the wizard attempts to adjust the radiation level, if necessary.
|
| •
|
If the reading is within the acceptable range, the wizard continues to the next phase. |
|
| •
|
If further adjustment is necessary, the current phase is repeated. |
|
| •
|
If the level of UV radiation is too low to be properly adjusted, the wizard continues to the next phase, but the final wizard screen indicates that the lamp’s radiation for the printing mode is unacceptable. |
Before testing and calibrating the UV lamps:
- Make sure the glass lens on each UV lamp is clean. For easy access, run the Head Cleaning Wizard, and use the special cleaning pad supplied.
- Make sure that the UV radiation meter is available to you, and that the sensor’s lens is clean.
To test and calibrate UV lamp radiation:
|
| 1.
|
Start the UV Calibration Wizard from the Options menu. |
|
| 2.
|
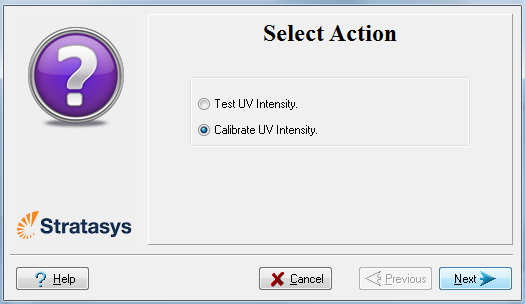
In the following screen, select Calibrate UV Intensity to adjust the power supplied to the UV lamps so that the UV radiation is within the acceptable range. |
|
| 3.
|
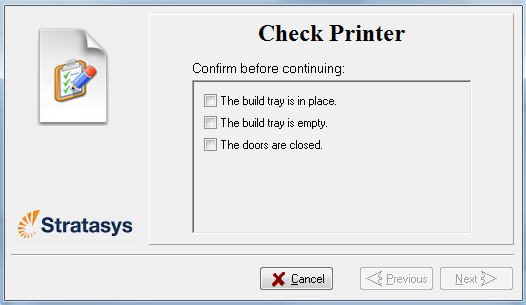
Make sure that the build tray is clear (empty), and close the printer doors. Confirm this in the wizard screen and click Next. |
|
| 4.
|
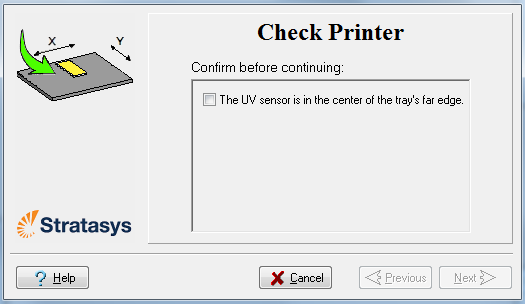
When the following screen appears, open the printer and place the UV sensor at the rear edge of the tray, in the center. |
|
| 5.
|
Make sure that the sensor cable is securely connected to the sensor. |
|
| 6.
|
Lead the cable out of the printer so that you can close the printer, and make sure that the cable will not interfere with the moving print block. |
|
| 7.
|
Close the printer, while checking that the sensor does not move out of position. |
|
| 8.
|
Set the UV meter to measure mJ/cm2. |
|
| 9.
|
Set the range on the meter to 2,000. |
|
| 10.
|
Connect the cable from the sensor to the UV meter. |
|
| 11.
|
Turn on the UV meter, and wait until “0 0 0.0” appears on the display. |
|
| 12.
|
In the wizard screen, confirm that the sensor is positioned correctly, and click Next. |
When you click Next, the UV lamps power up and stabilize. (This takes several minutes.) Then, the print block passes over the sensor and the wizard compares the measured radiation to the recommended level.
When prompted by the wizard, zero (reset) the UV meter and enter the reading (measurement).
If the UV level measured is not acceptable, the wizard calibrates the UV lamp by adjusting the current supplied to it, and then tests it again.
When all UV tests have finished, the results are displayed, showing the condition of the lamps after calibration.
After examining the UV calibration results:
|
| 2.
|
Remove the UV meter and close the printer. After confirming the items listed in the wizard screen, click Next. |

 Related Topics